🛠️ Quick and easy to use roof strip generator
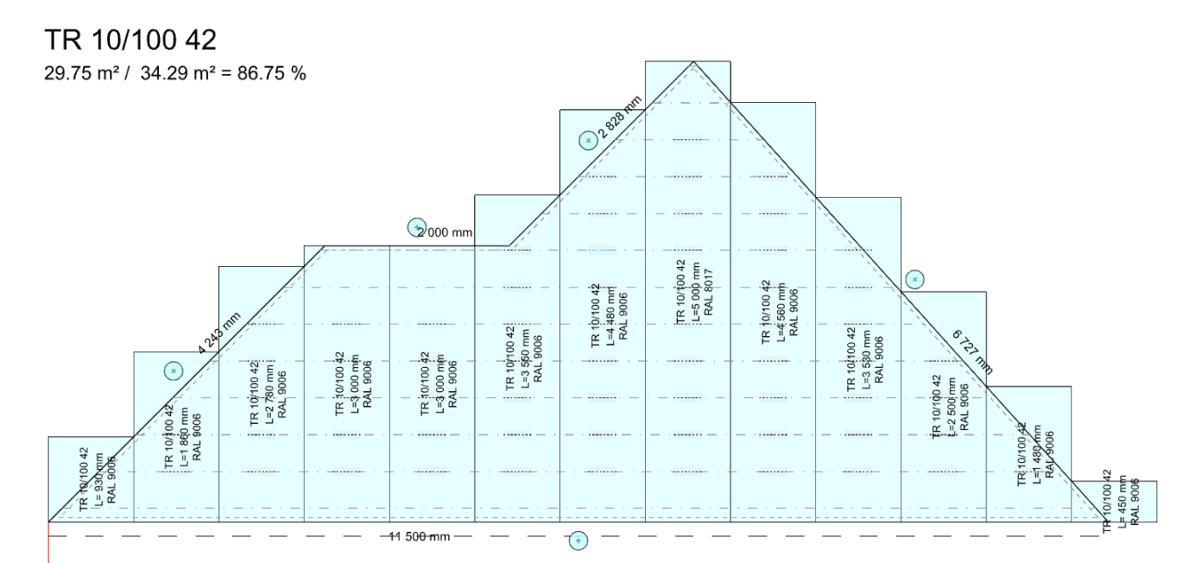
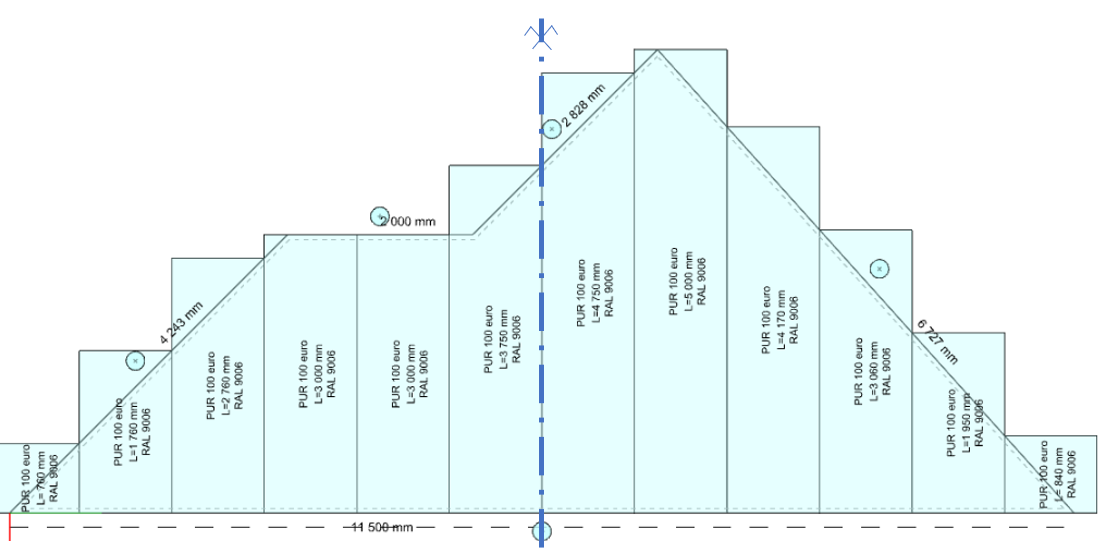
The Roof Strip Generator places the selected roofing material along the flat surface. The generator can be set for the entire sheathed area or, some settings are available by clicking on an individual strip. In the editing mode, the proportion of the total strip area to the sheathed area is always displayed.
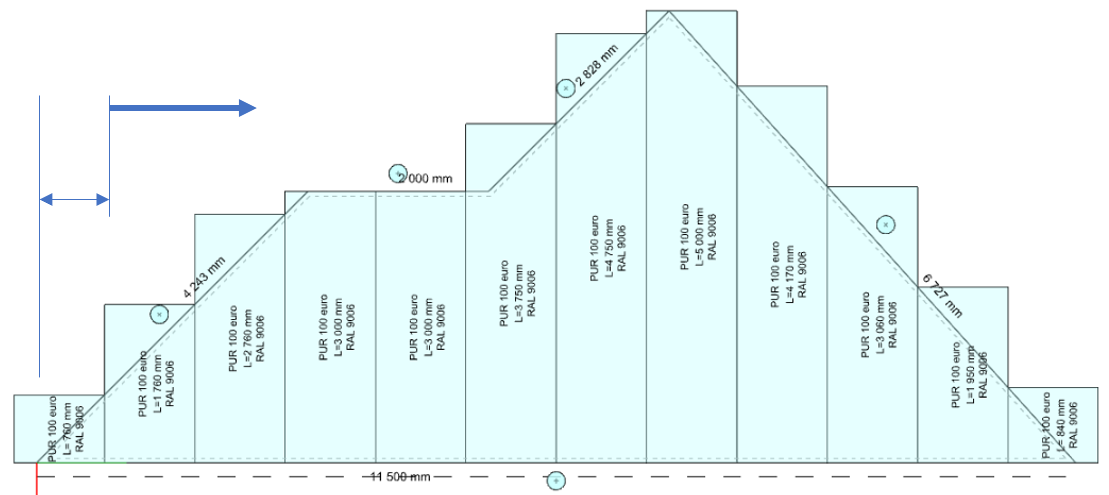
Laying direction
It is configurable, choosing from the following types:
- from the left
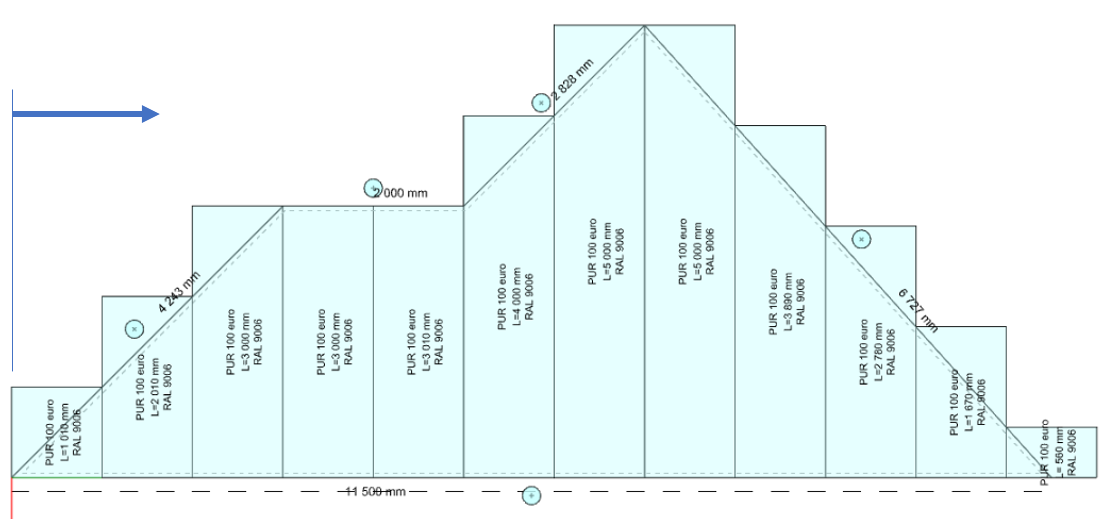
- from the right
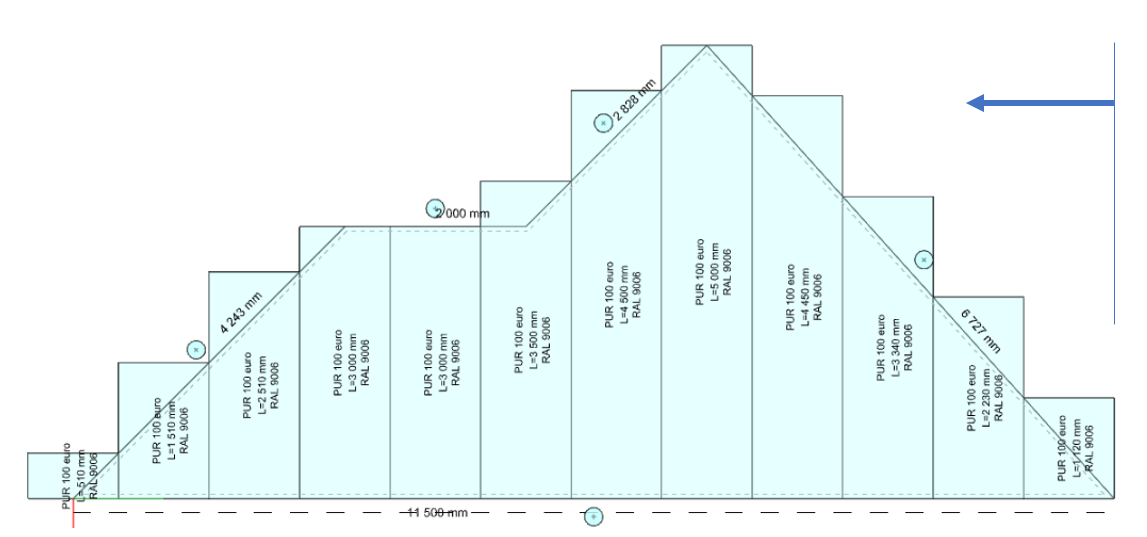
- center the middle strip of the roofing on the center of the eave side
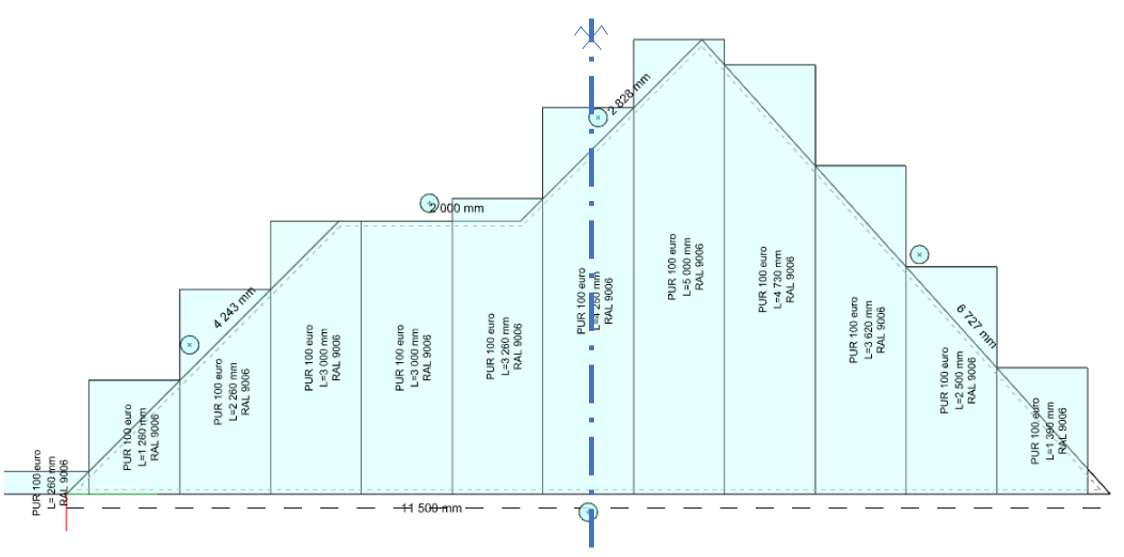
- place the edge of the roofing strip on the center of the gutter side
- general specification of the start of laying (laying from the left + distance)
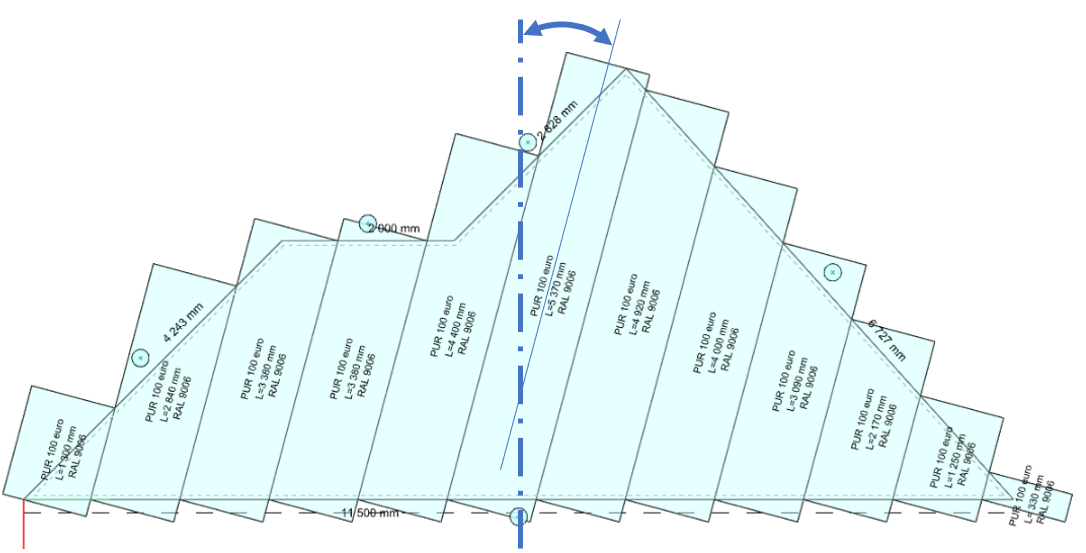
The angle of the laying of the strips
It is adjustable as positive or negative offset from the baseline.
Each specific strip
- disable ( then it is not reflected in drawings, detailed model or material reports.)
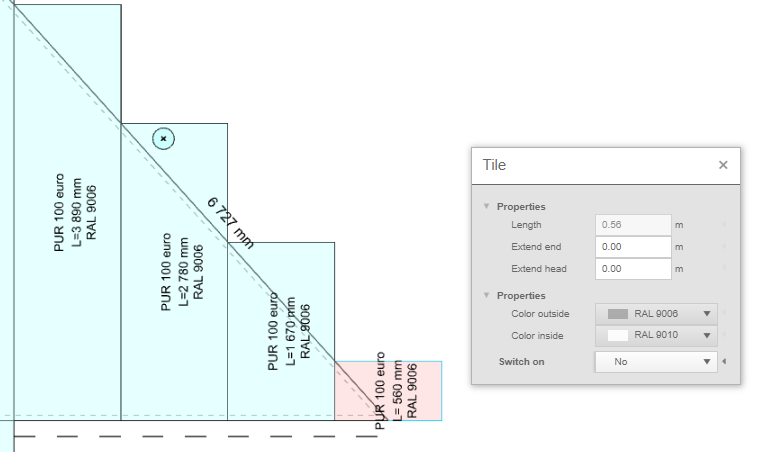
- lengthen or shorten the overlap
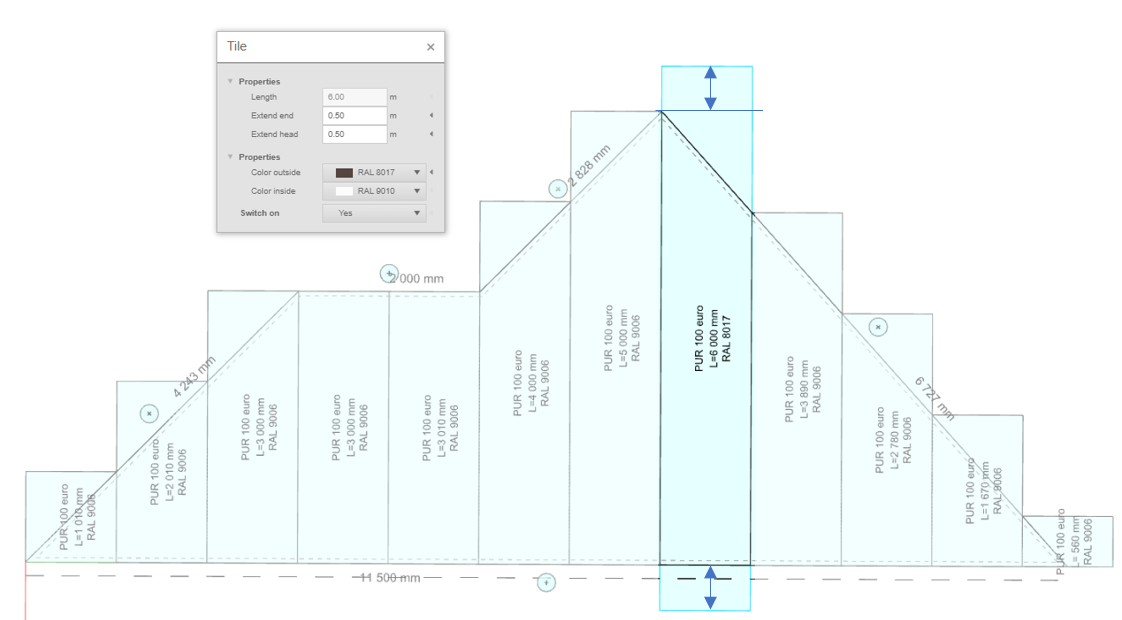
- overlay in appropriate places (according to the grid of the slats) Clicking on the indicated divisions above the slats can split the strip or, conversely, merge it if it has already been split.

Lengthening or shortening panels at the sides
For each side of the roof polygon, you can set the panel lengthening or shortening by clicking on the button above the edge.
