🪟 How to Work with the Openings Step by Step
The Openings menu gives you full control over windows and other types of openings in your roof project. You can add new openings, adjust their size and position, and even duplicate or move them with just a few clicks.
⚠️ Note:* Certain functions like Control and Edit buttons are accessible only in Advanced mode. Check the Settings guide for instructions on unlocking all features.*
1️⃣ Adding an Opening
On each roof plane, the Control button appears once you enter the Openings menu. Click this button to open the list of available openings, select the type you need, and it will be automatically placed on the chosen roof plane. Of course, you can continue adjusting it afterwards.
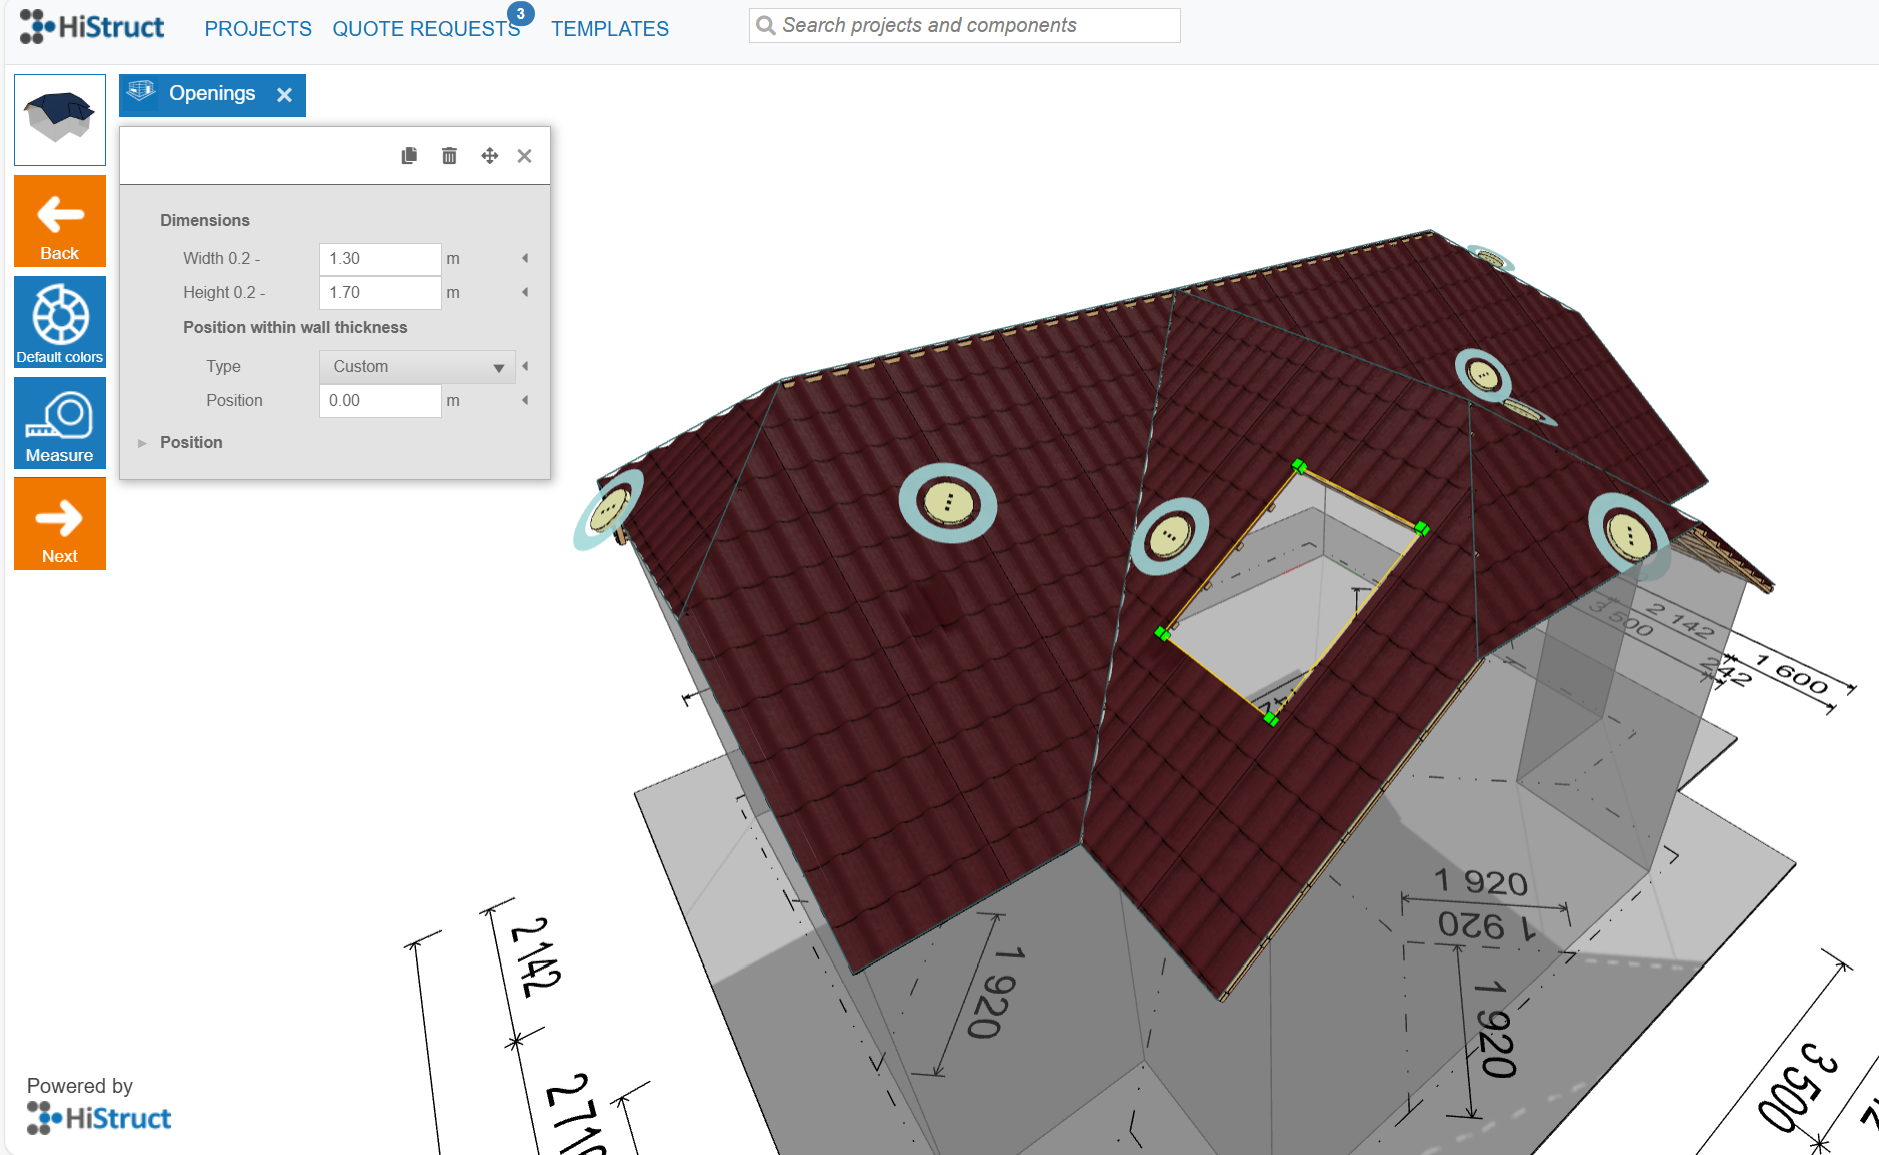
2️⃣ Editing Openings
Once you select an opening in the 3D model by clicking on it, you can resize and reposition the opening directly in the 3D model by dragging it with the mouse (drag & drop).
At the same time opening properties panel opens. Here you can:
-
Change width and height (enter exact values in meters)
-
Adjust the position numerically for maximum precision
👉 Default colors of openings can be set via the Default Colors button in the left side menu, where you can define standard colors for selected types of openings.
3️⃣ Copying Openings
Finished one opening and want to reuse it? Click on the opening and use the copy icon in the properties panel - the selected opening will be duplicated, keeping all of its settings. This makes it easy to create consistent layouts without starting from scratch. Continue by adjusting the position of the newly created opening via the properties panel.
4️⃣ Moving Openings
There are two ways to move an opening:
-
Drag & drop directly in the model - just click and move it with the mouse.
-
Use the Move icon in the properties panel - once clicked, a guiding line appears and you can reposition the opening with more control.
5️⃣ Measuring Openings
Use the Measure button to check the exact size and placement of your openings in the model.
✅ That's it - your model is now complete with openings. Ready to move forward? Next, it's time to generate your outputs - documents, detailed drawings, BOM, and more to prepare perfect Quote. 👉 Check out the next article to see how to get them.